Tutorial: Basic GUI with OpenCV
In this article, we are going to create a basic user interface with
OpenCV. The OpenCV user interface allows us to create windows, add
images to it, and move, resize, and destroy it. The user interface is
in OpenCV's highui module. In the following code, we are going to
learn how to create and show two images by pressing a key to display
multiple windows with the image moving in the window on our desktop.
Don't worry about reading the full code; we are going to explain it in small chunks:
#include <iostream>
#include <string>
#include <sstream>

using namespace std;

// OpenCV includes

#include <opencv2/core.hpp>
#include <opencv2/highgui.hpp>

using namespace cv;

int main(int argc, const char** argv)
{

    // Read images
    Mat lena= imread("../lena.jpg");

    // Checking if Lena image has been loaded
    if (!lena.data) {
        cout << "Lena image missing!" << endl;
        return -1;
    }

    Mat photo= imread("../photo.jpg");
    // Checking if the photo has been loaded
    if (!photo.data) {
        cout << "The photo missing!" << endl;
        return -1;
    }

    // Create windows
    namedWindow("Lena", WINDOW_NORMAL);
    namedWindow("Photo", WINDOW_AUTOSIZE);

    // Move window
    moveWindow("Lena", 10, 10);
    moveWindow("Photo", 520, 10);

    // show images
    imshow("Lena", lena);
    imshow("Photo", photo);

    // Resize window, only non autosize
    resizeWindow("Lena", 512, 512);

    // wait for any key press
    waitKey(0);

    // Destroy the windows
    destroyWindow("Lena");
    destroyWindow("Photo");

    // Create 10 windows
    for(int i =0; i< 10; i++) {
        ostringstream ss;
        ss << "Photo " << i;
        namedWindow(ss.str());
        moveWindow(ss.str(), 20*i, 20*i);
        imshow(ss.str(), photo);
    }

    waitKey(0);

    // Destroy all windows
    destroyAllWindows();

    return 0;
}
Let's understand the code:
The first task we have to do in order to facilitate a graphical user interface is to import OpenCV's
highuimodule:#include <opencv2/highgui.hpp>
Now that we are prepared to create our new windows, we have to load some images:
// Read images
Mat lena= imread("../lena.jpg");
Mat photo= imread("../photo.jpg");
To create the windows, we use the
namedWindowfunction. This function has two parameters; the first is a constant string with the window's name, and the second is the flags that we require. This second parameter is optional:namedWindow("Lena", WINDOW_NORMAL); namedWindow("Photo", WINDOW_AUTOSIZE);
In our case, we create two windows: the first is called Lena, and the second is called Photo.
There are three flags by default for Qt and native:
WINDOW_NORMAL: This flag allows the user to resize the window;WINDOW_AUTOSIZE: If this flag is set, the window size is automatically adjusted to fit the display image and it is not possible to resize the window;WINDOW_OPENGL: This flag enables the OpenGL support.
Qt has a number of additional flags:
WINDOW_FREERATIOorWINDOW_KEEPRATIO: IfWINDOW_FREERATIOis set, the image is adjusted with no respect for its ratio. IfWINDOW_KEEPRATIOis set, the image is adjusted with respect to its ratio;WINDOW_GUI_NORMALorWINDOW_GUI_EXPANDED: The first flag facilitates a basic interface without the status bar and the toolbar. The second flag facilitates the most advanced graphical user interface, with the status bar and the toolbar.
Note:
If we compile OpenCV with Qt, all the windows that we create are, by default, in the expanded interface, but we can use native interfaces and more basic ones adding the
CV_GUI_NORMALflag. By default, the flags areWINDOW_AUTOSIZE,WINDOW_KEEPRATIO, andWINDOW_GUI_EXPANDED.When we create multiple windows, they are superimposed, but we can move the windows to any area of our desktop using the
moveWindowfunction, as follows:// Move window moveWindow("Lena", 10, 10); moveWindow("Photo", 520, 10);
In our code, we move the
Lenawindow10pixels to the left, and10pixels up, and thePhotowindow520pixels to the left, and10pixels up.After showing the images that we loaded previously using the
imshowfunction, we resize theLenawindow to512pixels, calling theresizeWindowfunction. This function has three parameters: thewindow name,width, andheight.// show images imshow("Lena", lena); imshow("Photo", photo); // Resize window, only non autosize resizeWindow("Lena", 512, 512);
Note:
The specific window size is for the image area. Toolbars are not counted. Only windows without the
WINDOW_AUTOSIZEflag enabled can be resized.After waiting for a key press with the
waitKeyfunction, we are going to remove or delete our windows using thedestroyWindowfunction, where the name of the window is the only parameter required:waitKey(0); // Destroy the windows destroyWindow("Lena"); destroyWindow("Photo");
OpenCV has a function to remove all windows that we create in only one call. The function is called
destroyAllWindows. To demonstrate how this works, we create 10 windows in our sample and await a key press. When the user presses any key, it destroys all the windows:// Create 10 windows for(int i =0; i< 10; i++) { ostringstream ss; ss << "Photo " << i; namedWindow(ss.str()); moveWindow(ss.str(), 20*i, 20*i); imshow(ss.str(), photo); } waitKey(0); // Destroy all windows destroyAllWindows();
In any event, OpenCV handles the destruction of all windows automatically when the application is terminated, and it is not necessary to call this function at the end of our application.
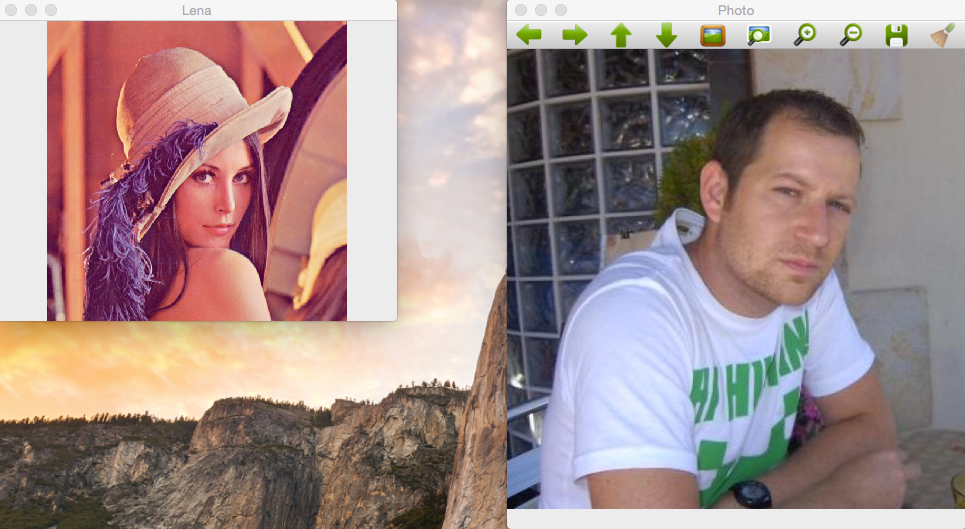
The result of all this code can be seen in the following images across two steps. First, it shows two windows:
After pressing any key, the application continues and draws several windows changing their positions:

With a few lines of code, we are able to create and manipulate windows and show images. We are now ready to facilitate user interaction with images and add user interface controls.
Note:
To compile this program, we should link it agaist three libraries provided by OpenCV:
opencv_core,lopencv_highgui, andopencv_imgcodecs.
Adding slider and mouse events to our interfaces
Mouse events and slider control are very useful in computer vision and OpenCV. Using these control users, we can interact directly with the interface and change the properties of the input images or variables. In this section, we are going to introduce the mouse events and slider controls for basic interactions. To facilitate proper understanding, we have created the following code, by means of which we are going to paint green circles in an image, using mouse events, and blur the image with the slider:
// OpenCV includes
#include <opencv2/opencv.hpp>
#include <opencv2/highgui.hpp>

using namespace cv;

// Create a variable to save the position value in track
int blurAmount=15;

// Trackbar call back function
static void onChange(int pos, void* userInput);

//Mouse callback
static void onMouse(int event, int x, int y, int, void* userInput);

int main(int argc, const char** argv) {
   // Read images
   Mat lena= imread("../lena.jpg");

   // Create windows
   namedWindow("Lena");

   // create a trackbar
   createTrackbar("Lena", "Lena", &blurAmount, 30, onChange, &lena);

   setMouseCallback("Lena", onMouse, &lena);
   // Call to onChange to init

   onChange(blurAmount, &lena);

   // wait app for a key to exit
   waitKey(0);

   // Destroy the windows
   destroyWindow("Lena");

   return 0;
}
Let's understand the code!
First, we create a variable to save the slider position. We need to save the slider position for access from other functions:
// Create a variable to save the position value in track
int blurAmount=15;
Now, we define our callbacks for our slider and mouse event,
required for the OpenCV
functions setMouseCallback and createTrackbar:
// Trackbar call back function
static void onChange(int pos, void* userInput);

//Mouse callback
static void onMouse(int event, int x, int y, int, void* userInput);
In the main function, we load an image and create a new window
called Lena:
// Read images
Mat lena= imread("../lena.jpg");

// Create windows
namedWindow("Lena");
Now is the time to create the slider. OpenCV has
the createTrackbar function to generate a slider with the
following parameters in order:
- Trackbar name.
- Window name.
- Integer pointer to use as a value; this parameter is optional. If it is set, the slider attains this position when created.
- Maximum position on slider.
- Callback function when the position of the slider changes.
- User data to send to callback. It can be used to send data to callbacks without using global variables.
To this code, we add trackbar for the Lena window and call
the Lena trackbar too in order to blur the image. The value of the
trackbar is stored in the blurAmount integer that we pass as a
pointer and set the maximum value of the bar to 30. We set
up onChange as a callback function and send the lena mat image
as user data:
// create a trackbar
createTrackbar("Lena", "Lena", &blurAmount, 30, onChange, &lena);
After creating the slider, we add the mouse events to paint circles when a user clicks the left button on the mouse. OpenCV has the setMouseCallback function. This function has three parameters:
- A window name where we get mouse events.
- A callback function to call when there is any mouse interaction.
- this is any data that will be sent to the callback
function when it's fired. In our example, we'll send
the entire
Lenaimage.
Using the following code, we can add a mouse callback to
the Lena window and set up onMouse as a callback function,
passing the lena mat image as user data:
setMouseCallback("Lena", onMouse, &lena);
To finalize the main function only, we need to initialize the image
with the same parameter as the slider. To carry out the
initialization, we only need to call the onChange callback
function and wait for events before closing the windows
with destroyWindow, as can be seen in the following code:
// Call to onChange to init
onChange(blurAmount, &lena);

// wait app for a key to exit
waitKey(0);

// Destroy the windows
destroyWindow("Lena");
The slider callback applies a basic blur filter to the image using the slider value as a blur quantity:
// Trackbar call back function
static void onChange(int pos, void* userData) {
    if(pos <= 0) return;

    // Aux variable for result
    Mat imgBlur;

    // Get the pointer input image
    Mat* img= (Mat*)userData;

    // Apply a blur filter
    blur(*img, imgBlur, Size(pos, pos));

    // Show the result
    imshow("Lena", imgBlur);
}
This function checks whether the slider value is 0 using the
variable pos. In this case, we do not apply the filter because it
generates a bad execution. We cannot apply a 0 pixel blur
either. After checking the slider value, we create an empty matrix
called imgBlur to store the blur result. To retrieve the image
sent through user data in the callback function, we have to
cast void* userData to the correct image type pointer Mat*.
Now we have the correct variables to apply the blur filter. The blur
function applies a basic median filter to an input image, *img in
our case; to an output image, the last required parameter is the
size of the blur kernel (a kernel is a small matrix used to
calculate the means of convolution between the kernel and the image)
that we want to apply. In our case, we are using a squared kernel
of pos size. Finally, we only need to update the image interface
using the imshow function.
The mouse events callback has five input parameters: the first parameter defines the event type; the second and third define the mouse position; the fourth parameter defines the wheel movement; and the fifth parameter defines the user input data.
The mouse event types are as follows:
| Event type | Description |
|---|---|
| EVENT_MOUSEMOVE | When the user moves the mouse. |
| EVENT_LBUTTONDOWN | When the user clicks the left mouse button. |
| EVENT_RBUTTONDOWN | When the user clicks the right mouse button. |
| EVENT_MBUTTONDOWN | When the user clicks the middle mouse button. |
| EVENT_LBUTTONUP | When the user releases the left mouse button. |
| EVENT_RBUTTONUP | When the user releases the right mouse button. |
| EVENT_MBUTTONUP | When the user releases the middle mouse button. |
| EVENT_LBUTTONDBLCLK | When the user double-clicks the left mouse button. |
| EVENT_RBUTTONDBLCLK | When the user double-clicks the right mouse button. |
| EVENT_MBUTTONDBLCLK | When the user double-clicks the middle mouse button. |
| EVENTMOUSEWHEEL | When the user executes a vertical scroll with the mousewheel. |
| EVENT_MOUSEHWHEEL | When the user executes a horizontal scroll with the mousewheel. |
In our sample, we only manage events that result from a left-click
of the mouse, and any event other than EVENT_LBUTTONDOWN is
discarded. After discarding other events, we obtain the input image
like that with the slider callback, and with a circle in the image
using the circle OpenCV function:
//Mouse callback
static void onMouse(int event, int x, int y, int, void* userInput) {
   if(event != EVENT_LBUTTONDOWN)
           return;
   // Get the pointer input image
   Mat* img= (Mat*)userInput;

   // Draw circle
   circle(*img, Point(x, y), 10, Scalar(0,255,0), 3);

   // Call on change to get blurred image
   onChange(blurAmount, img);
}
Note:
To compile this program, we should link it agaist four libraries provided by OpenCV:
opencv_core,lopencv_highgui,opencv_imgcodecs, andopencv_imgproc.
Further Reading
Hope you enjoyed reading this article. If you’d like to learn more about OpenCV, you should explore Learn OpenCV by Building Projects – Second Edition. Learn OpenCV by Building Projects – Second Edition is a practical guide with lots of tips, and is closely focused on developing Computer vision applications with OpenCV. Sample applications are developed throughout the book that you can execute and use in your own projects.